Creating Endpoint
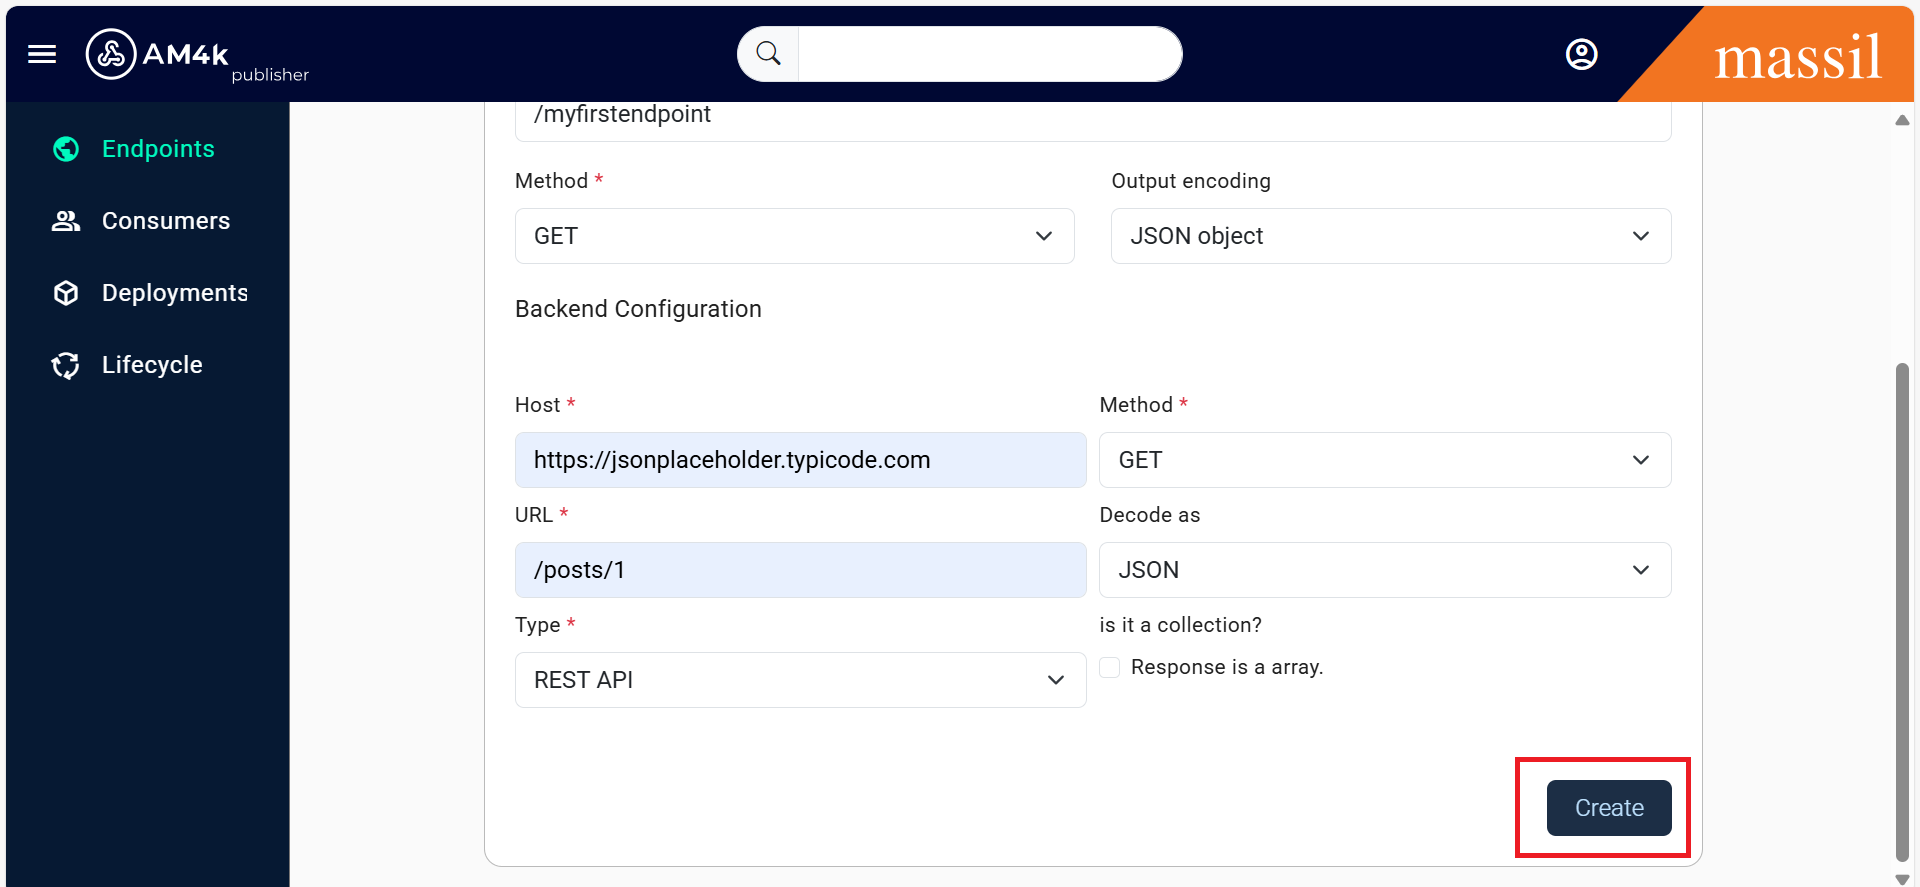
Step 1.Since this is a newly created API, no endpoints are available. Click on the Endpoints tab and create a new endpoint for understanding see the below table and shown image.
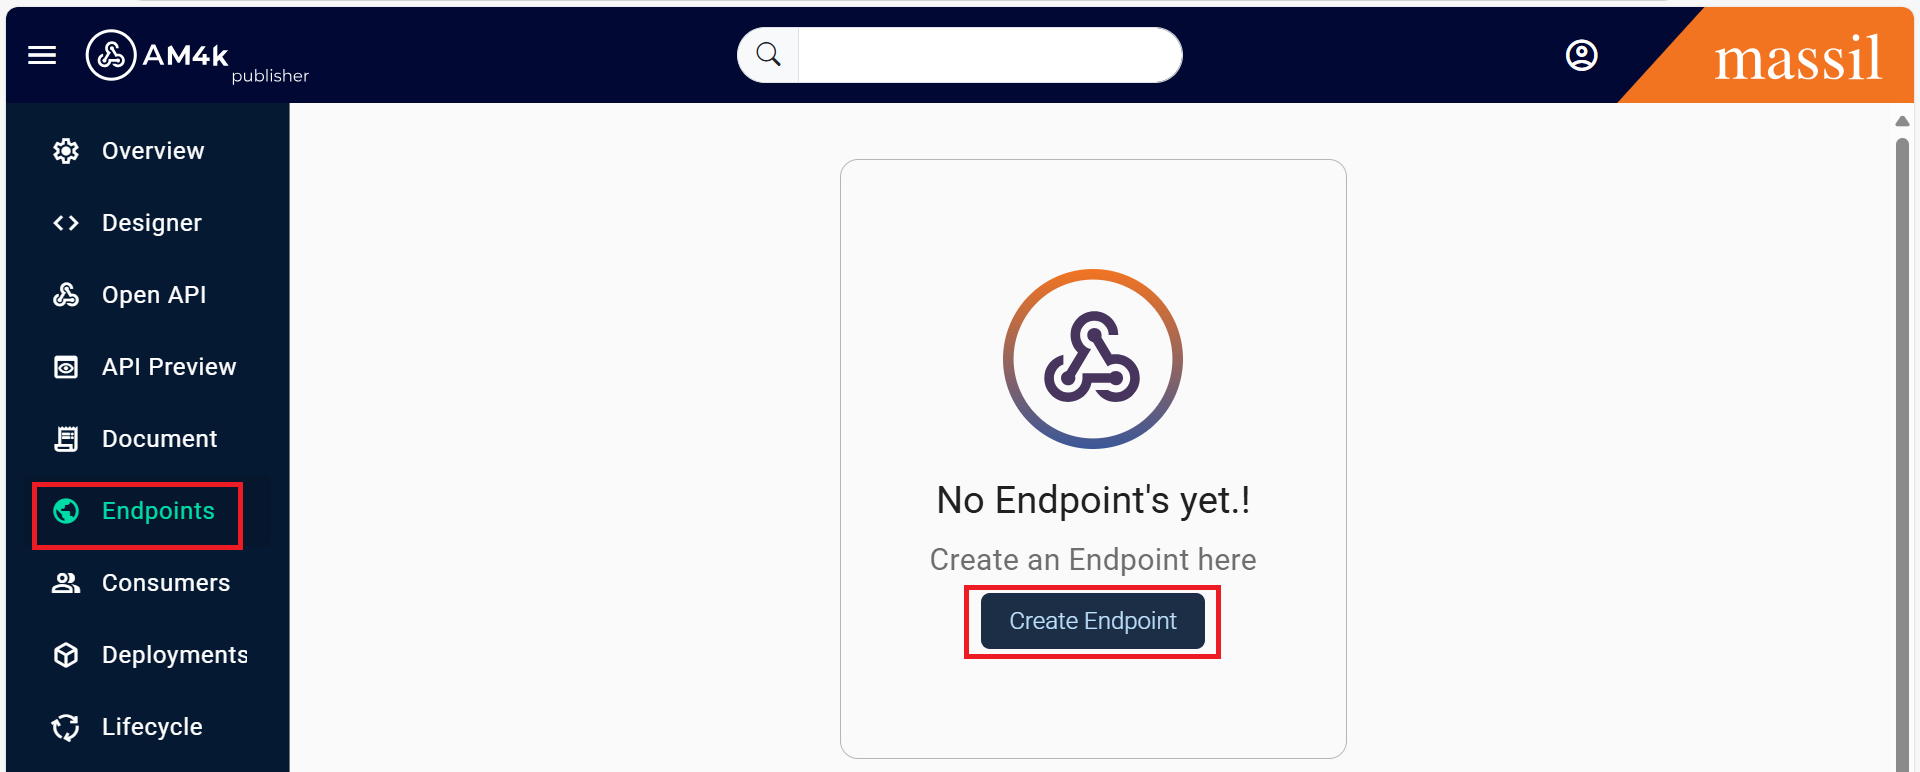
Creating Endpoint
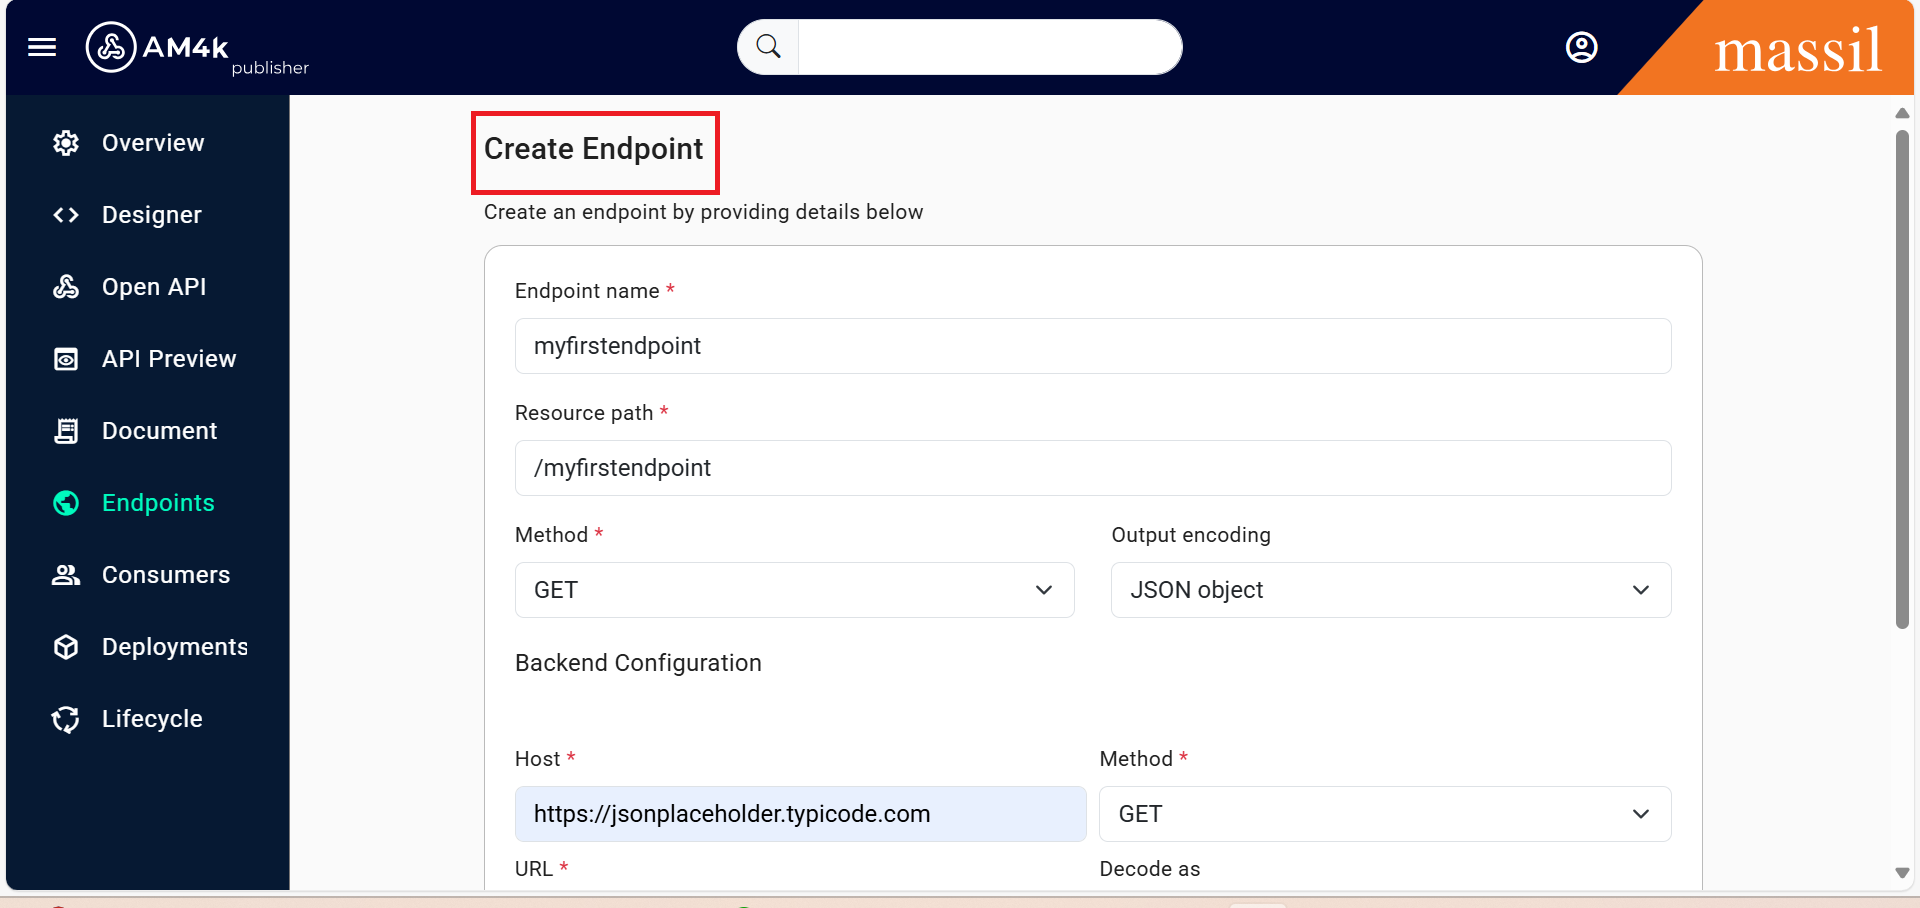
| Field | Sample Value |
|---|---|
| EndpointName | myfirstendpoint |
| Contextpath | /myfirstendpoint |
| Method | Method of endpoint you are exposing |
| OutputEncoding | JSON Object |
| {{< /table >}} |
Backend Endpoint Configurations
| Field | Sample Value |
|---|---|
| Host* | Backend Endpoint Host |
| URL* | Context path after host |
| Type | RestAPI, Rest To SOAP, AMQP Producer, AMQP Consumer, AWS Lambda |
| Method | Method Of Backend Endpoint |
| Dcode as | Type of Response like (XML,JSON,NO-op,String) |
Step 2.Enter Endpoint Details
Step 3.Note: Click on the checkbox "Is it a collection" if the response is an array
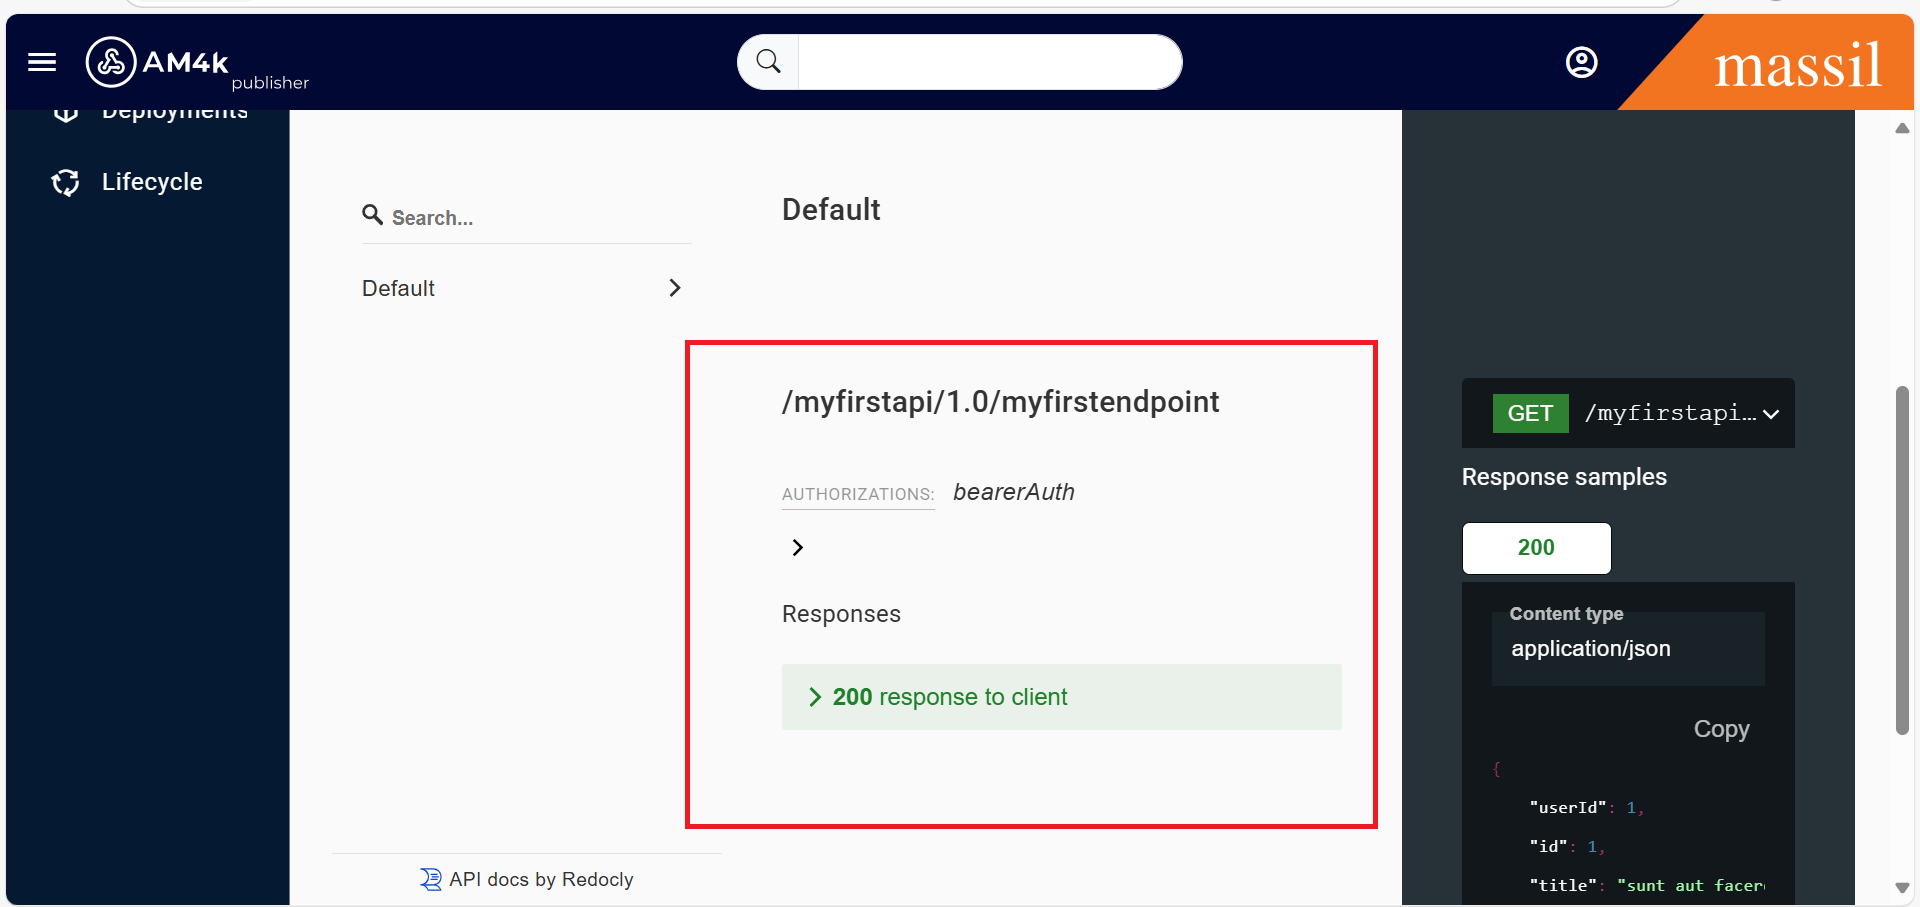
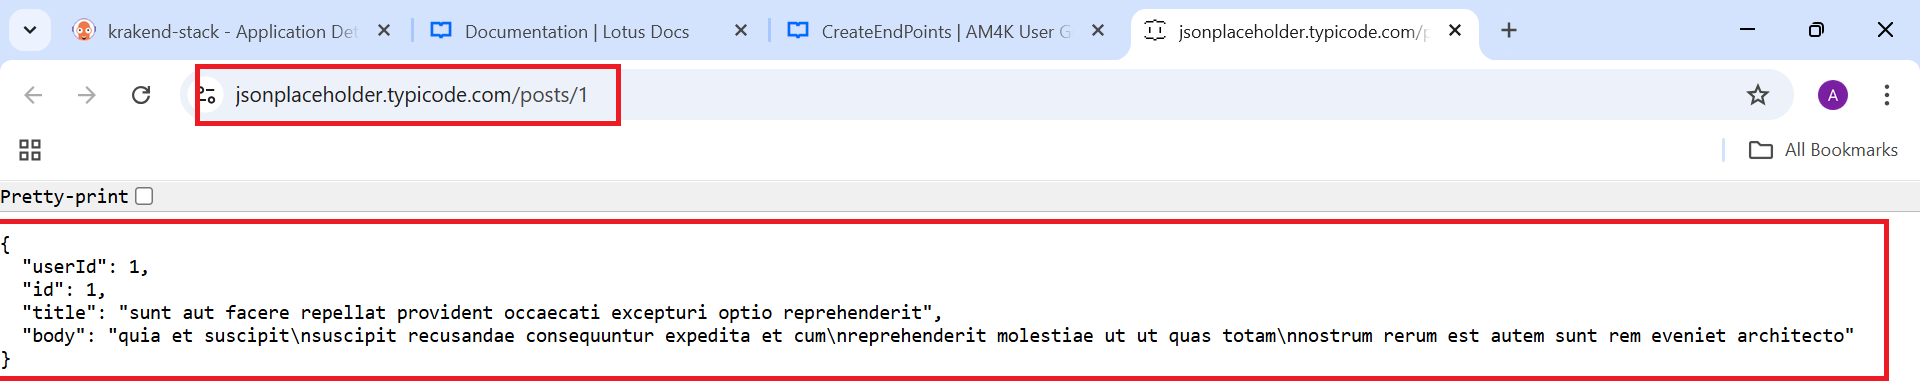
Step 4.Take this as example
Host :  https://jsonplaceholder.typicode.com

ContextPath:  /posts/1

Method: GET

Response from the Backend endpoint:

{

  "userId": 1,

  "id": 1,

  "title": "sunt aut facere repellat provident occaecati excepturi optio reprehenderit",

  "body": "quia et suscipit\nsuscipit recusandae consequuntur expedita et cum\nreprehenderit molestiae ut ut quas totam\nnostrum rerum est autem sunt rem eveniet architecto"

}
Step 5.You can check the above url using url https://jsonplaceholder.typicode.com/posts/1 so we will get in JSON Format here we no need to give check box Required array for clear understanding look into the shown image
Step 6.After providing all the required fields, click on create. Now, the endpoint is created.
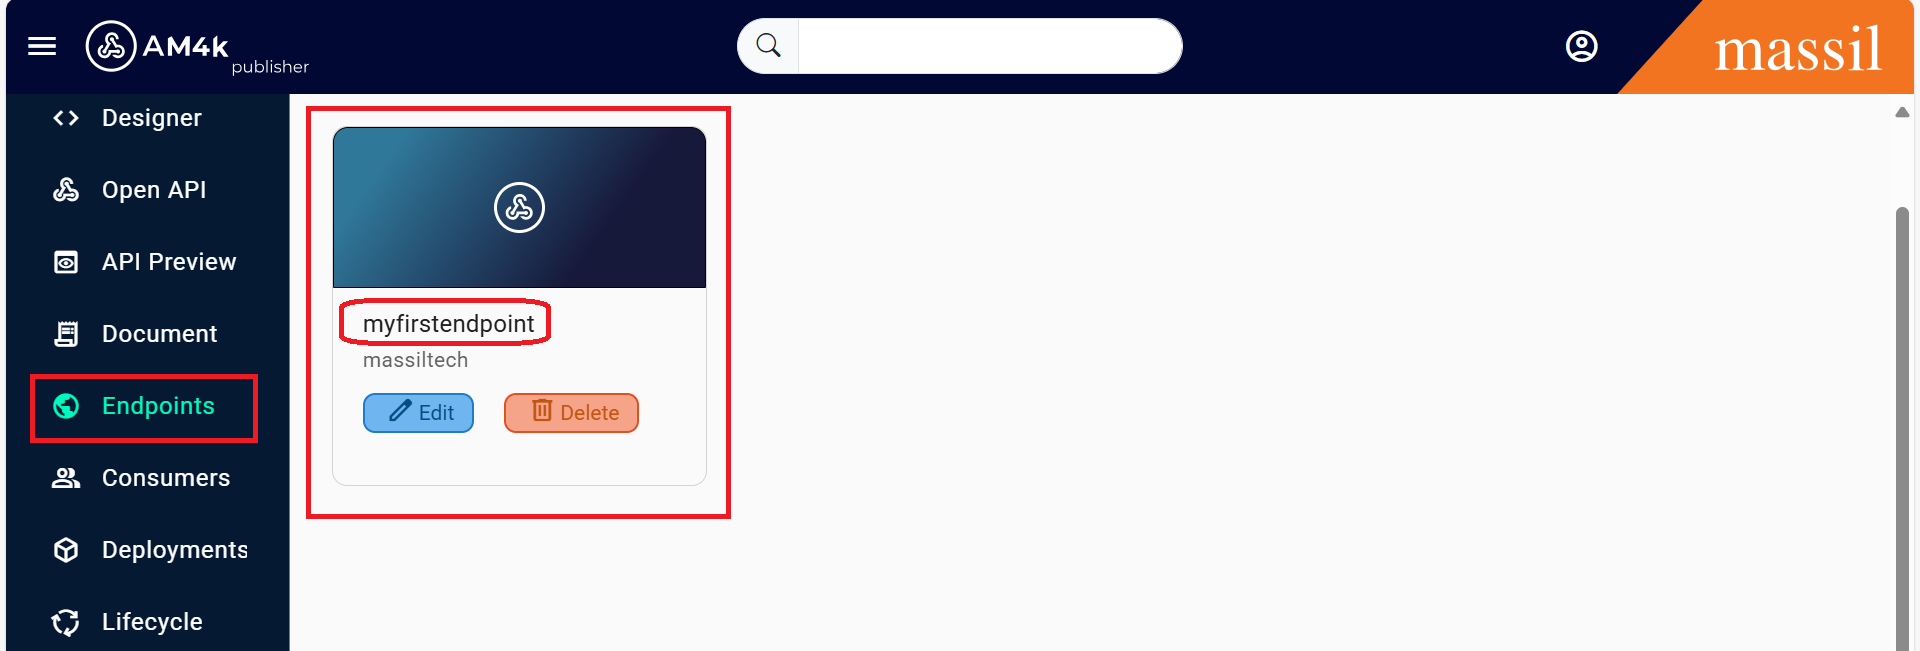
Step 7.The created endpoint will be visible as shown below
Security
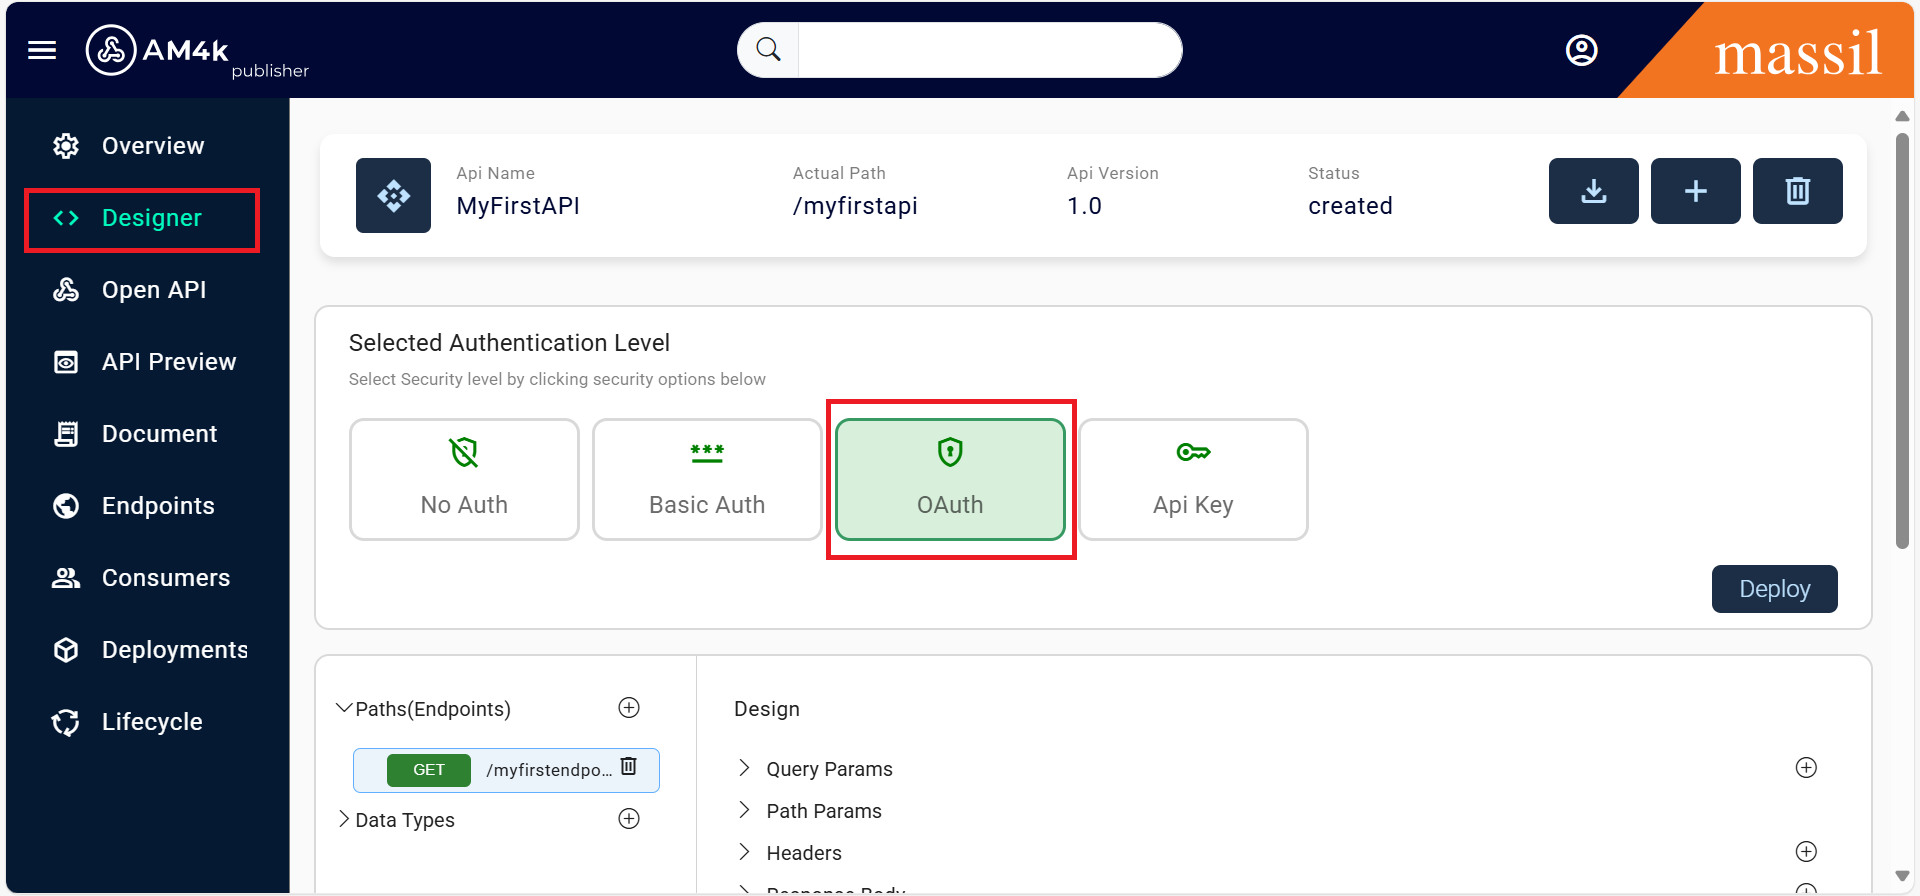
Step 8.Click on Designer on the left side of the page inside the API.
Step 9.Select the Type of Security, which is available by default, such as API Key, OAuth, or BasicAuthentication as shown in image.
Step 10.Based on the security selected in the Publisher portal, the API will be secured.
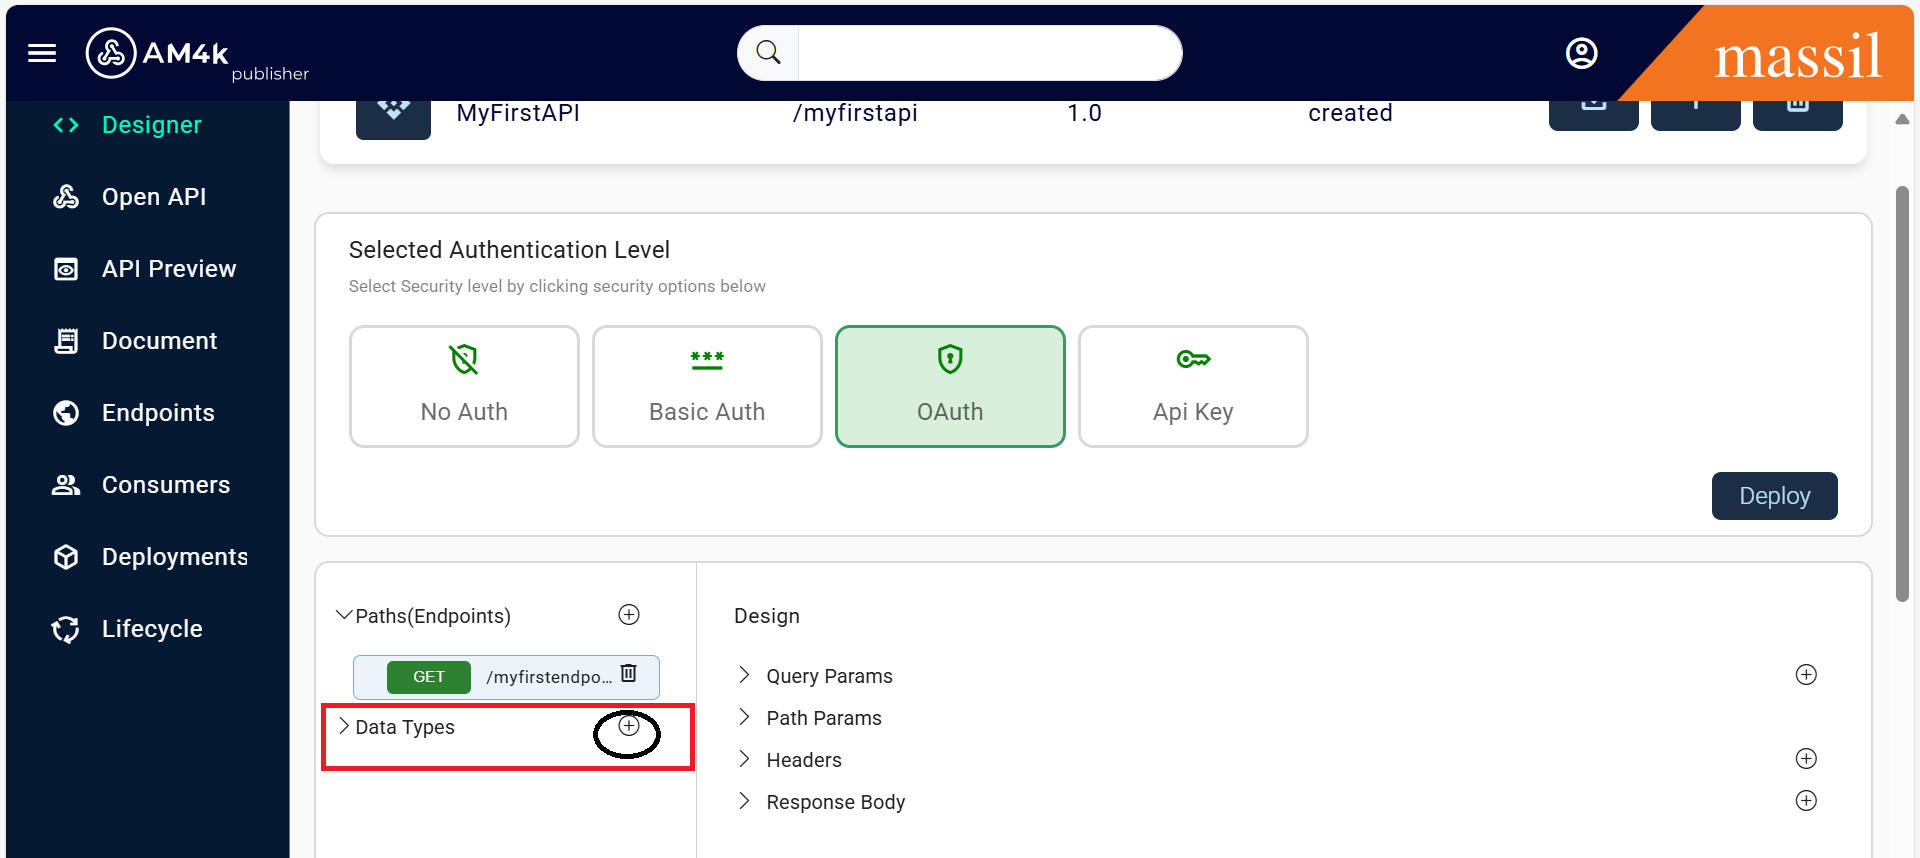
Step 11.Click on Data Types in Left side you can see when you click "+" icon you will see the form and provide the required fields, such as Name, Description, and Response Body, as shown in the images below.
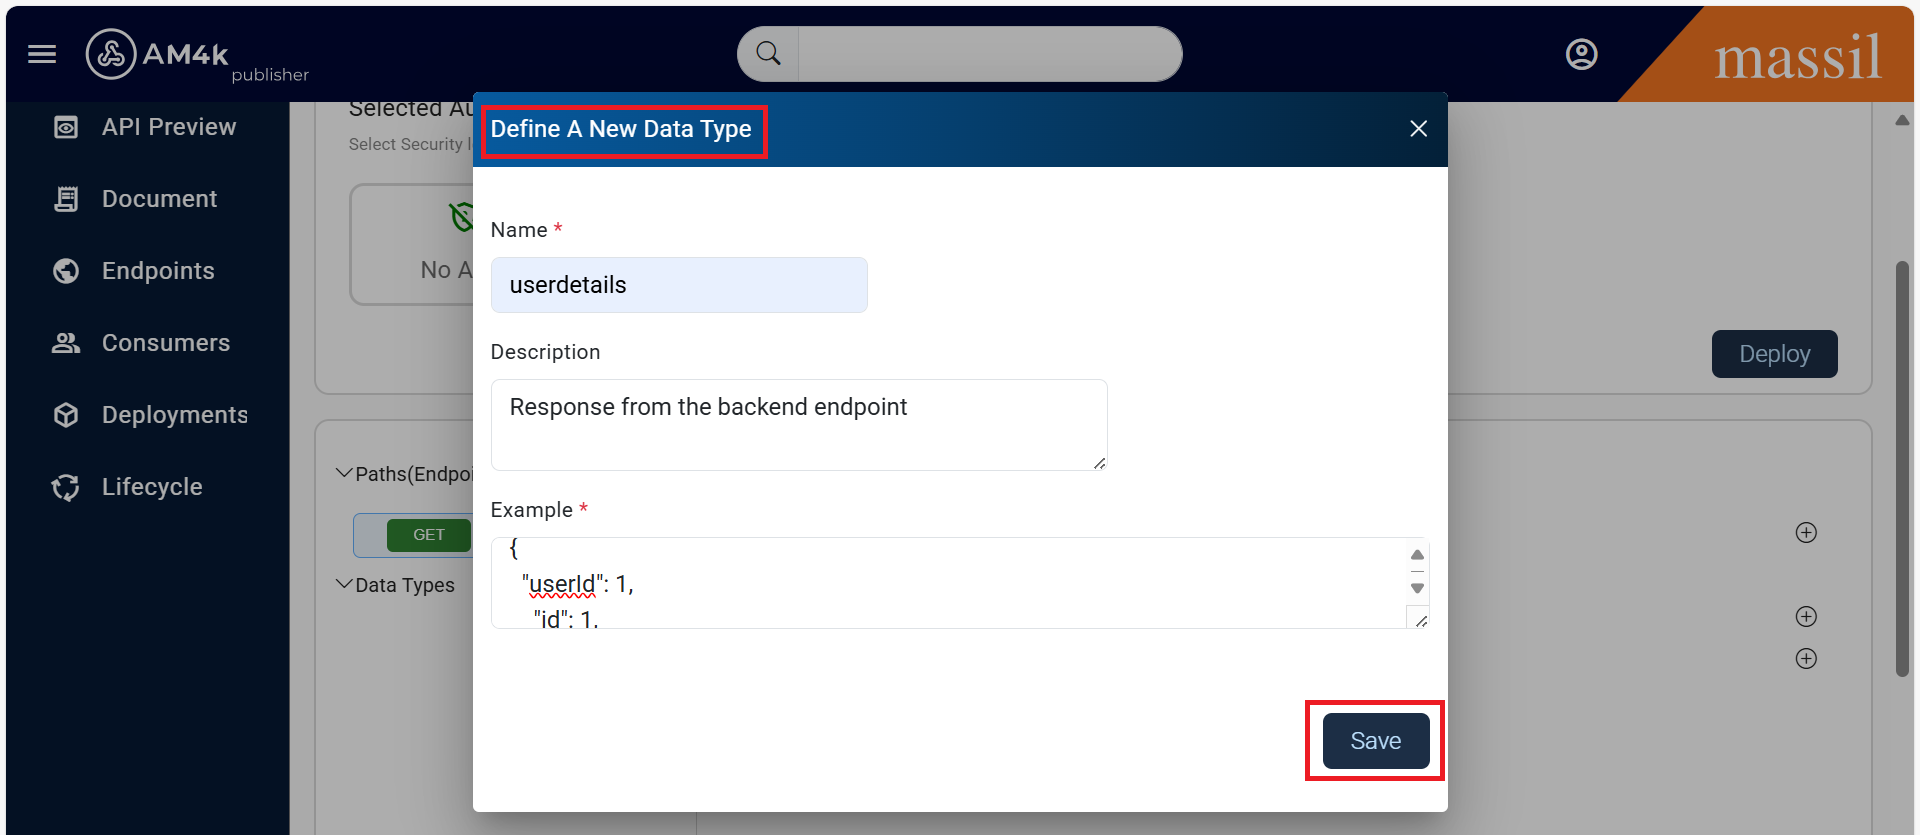
Step 12.Take this as example
Response body:
{

  "userId": 1,

  "id": 1,

  "title": "sunt aut facere repellat provident occaecati excepturi optio reprehenderit",

  "body": "quia et suscipit\nsuscipit recusandae consequuntur expedita et cum\nreprehenderit molestiae ut ut quas totam\nnostrum rerum est autem sunt rem eveniet architecto"

}
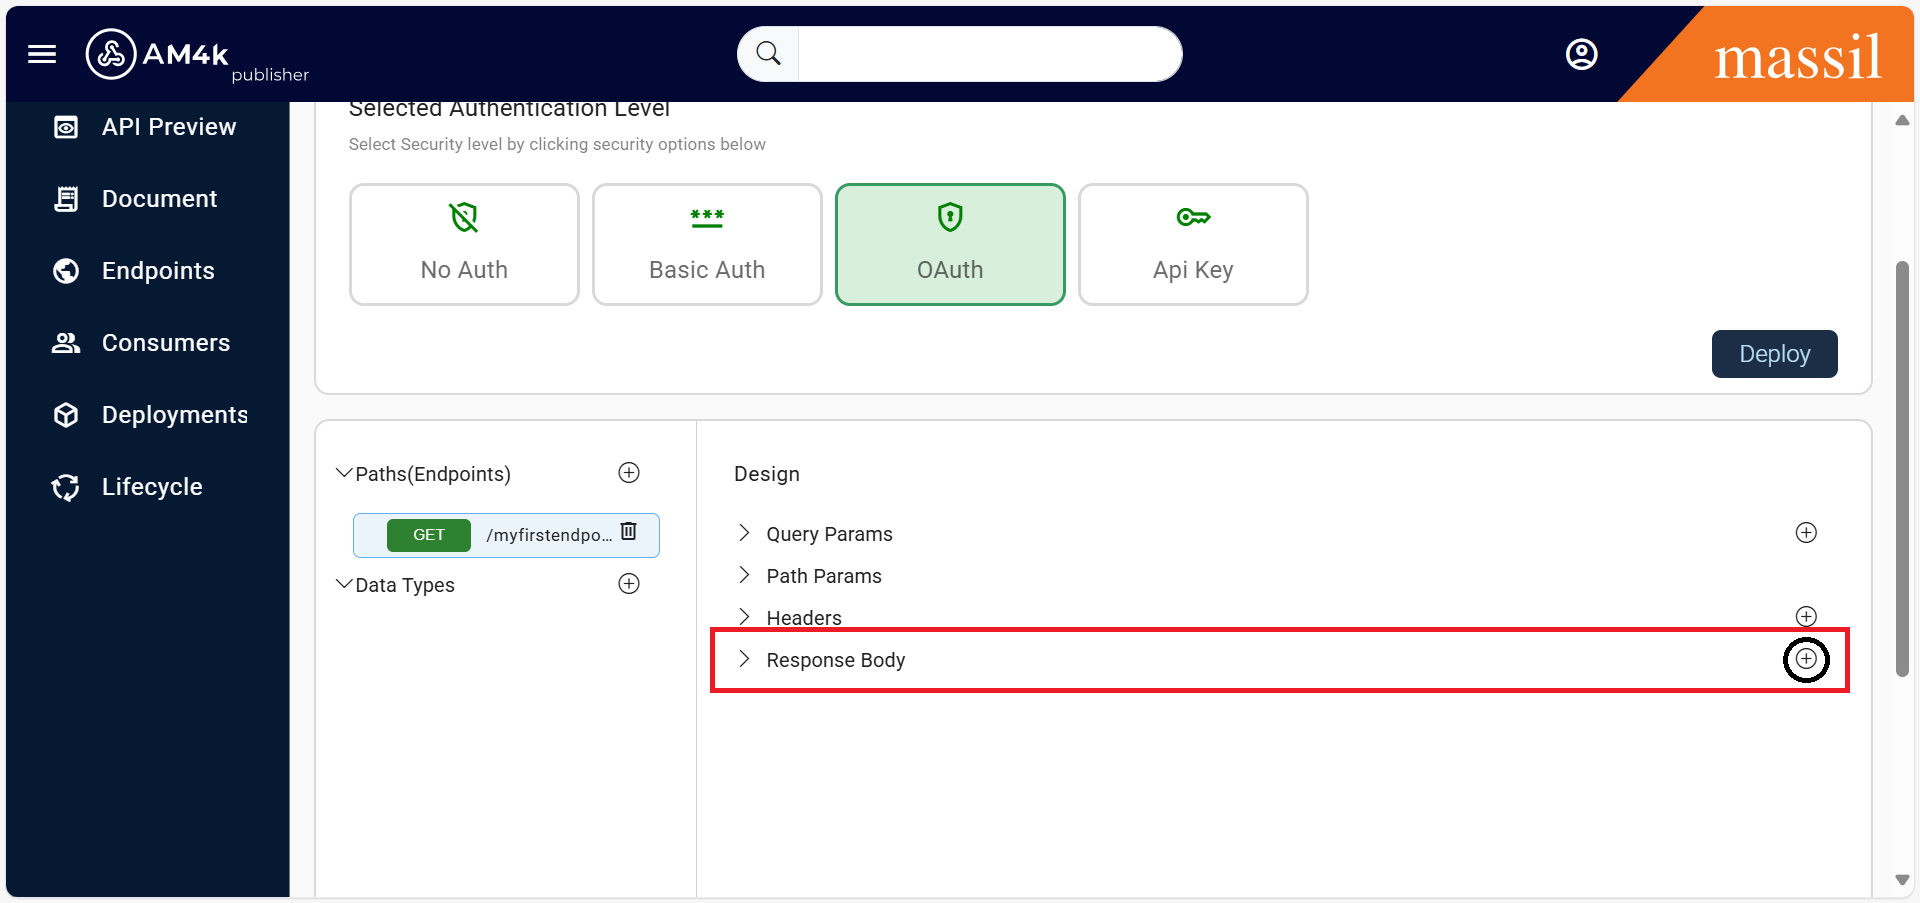
Step 13.The data type provided in the above step will be visible in the Response Body You can see it on the right side when you click on the "+" symbol, as shown below.
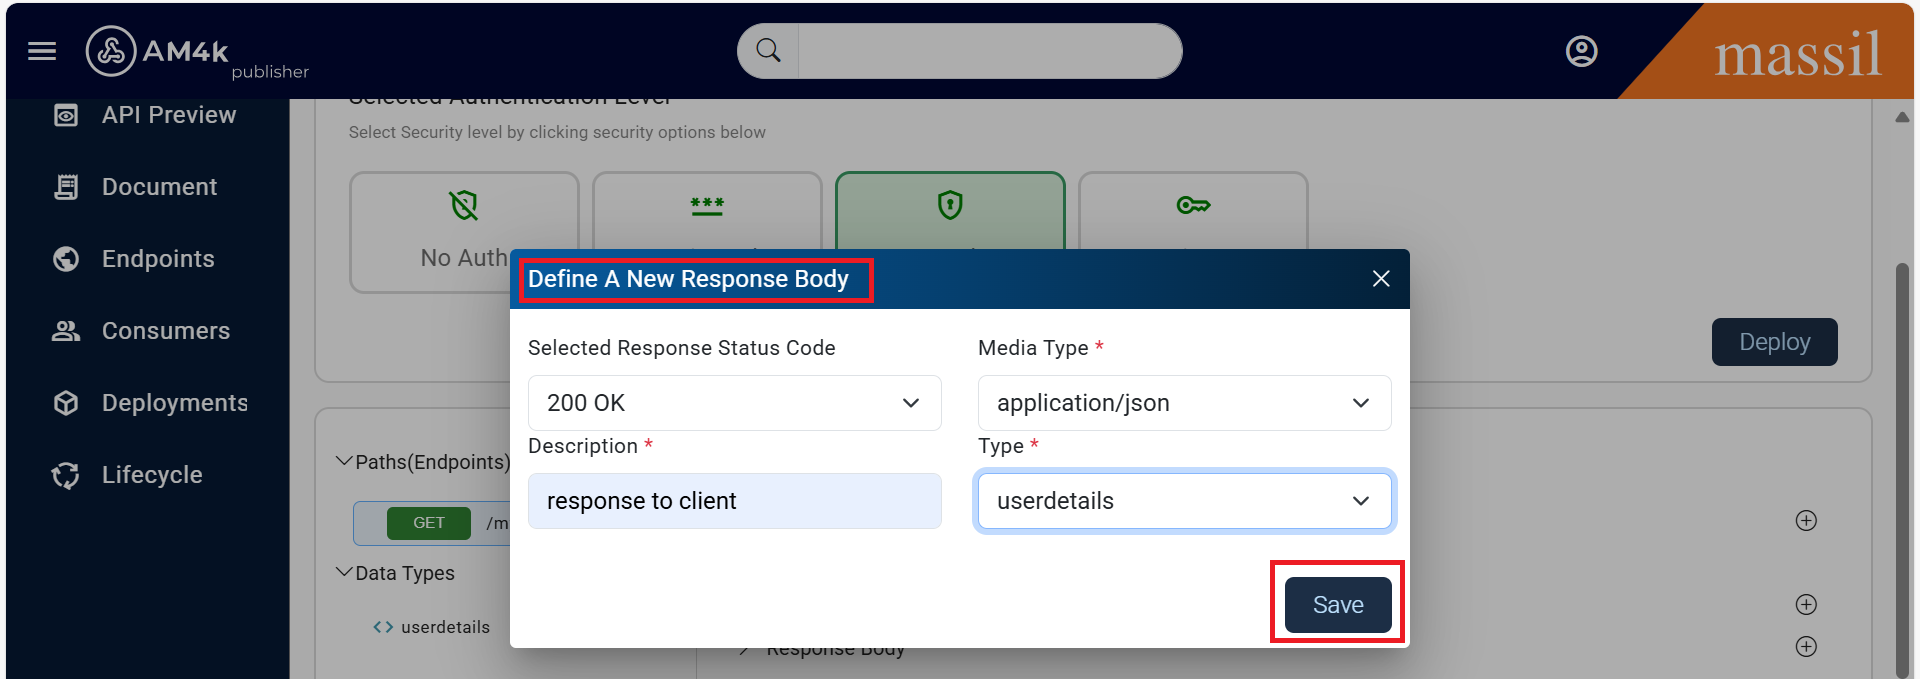
Step 14.Select the Response Status Code, Media Type, Description, and Type. You can add multiple status codes (e.g., 400, 429) and provide the respective response body in the Type field, which is already created in Data Types, as mentioned in the previous step click on save.
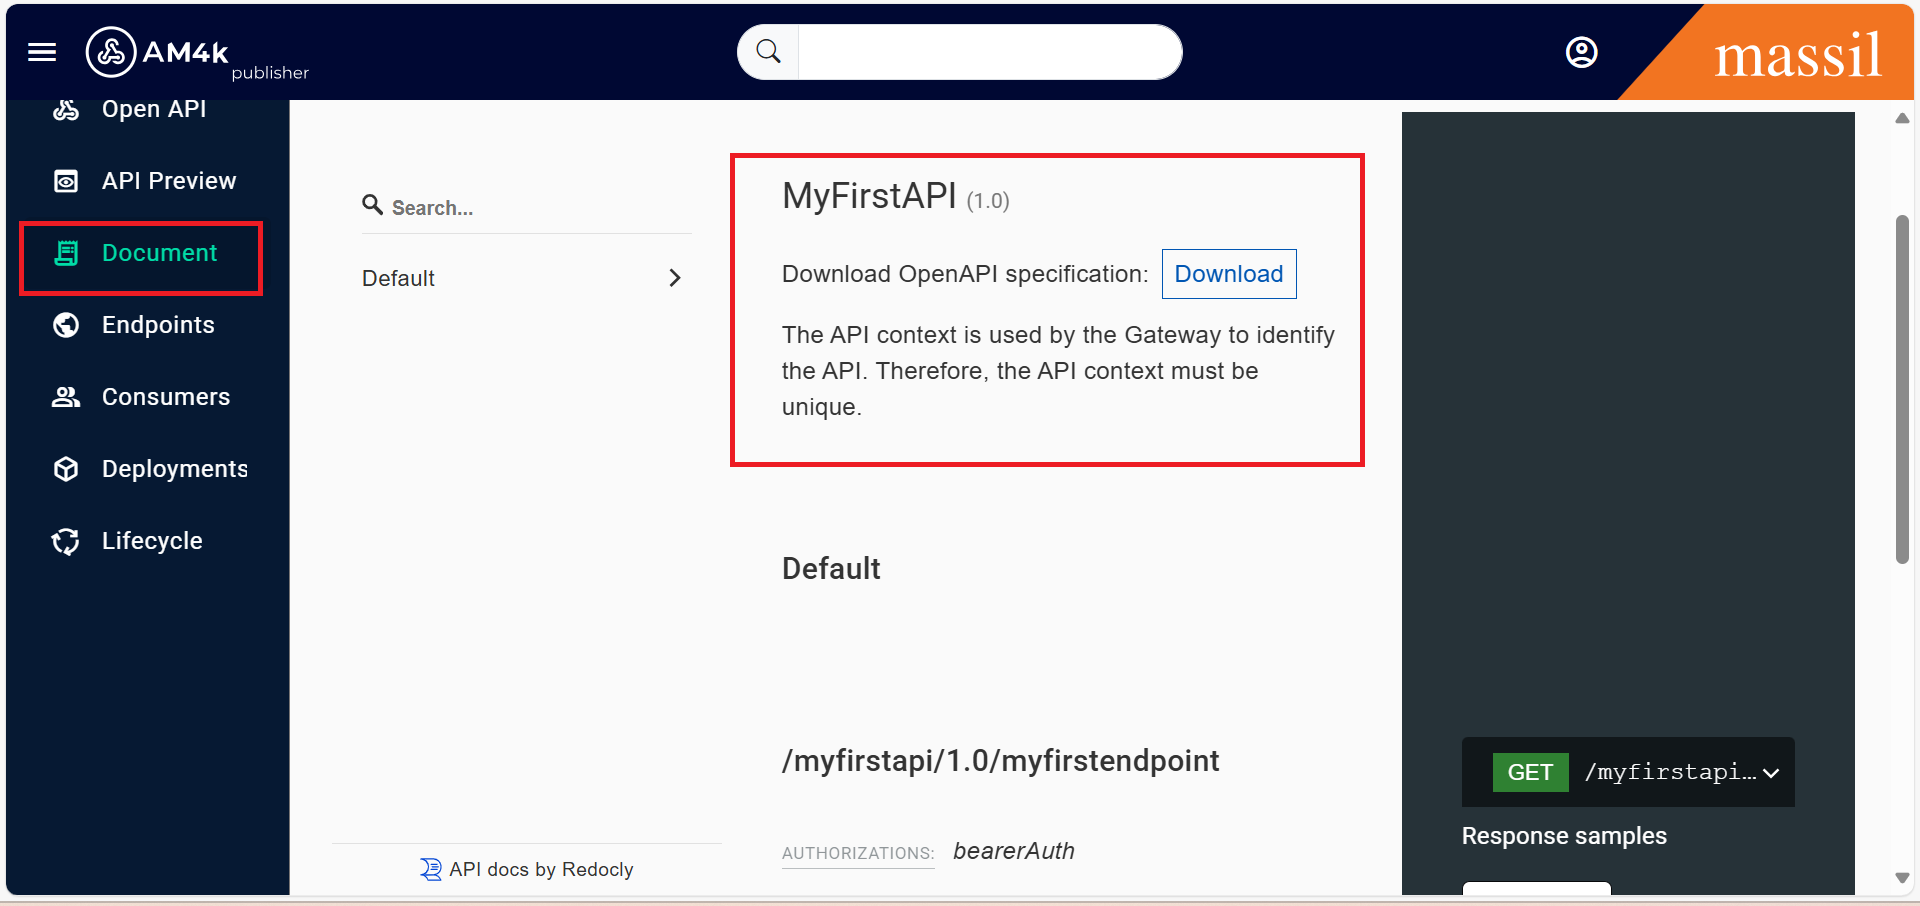
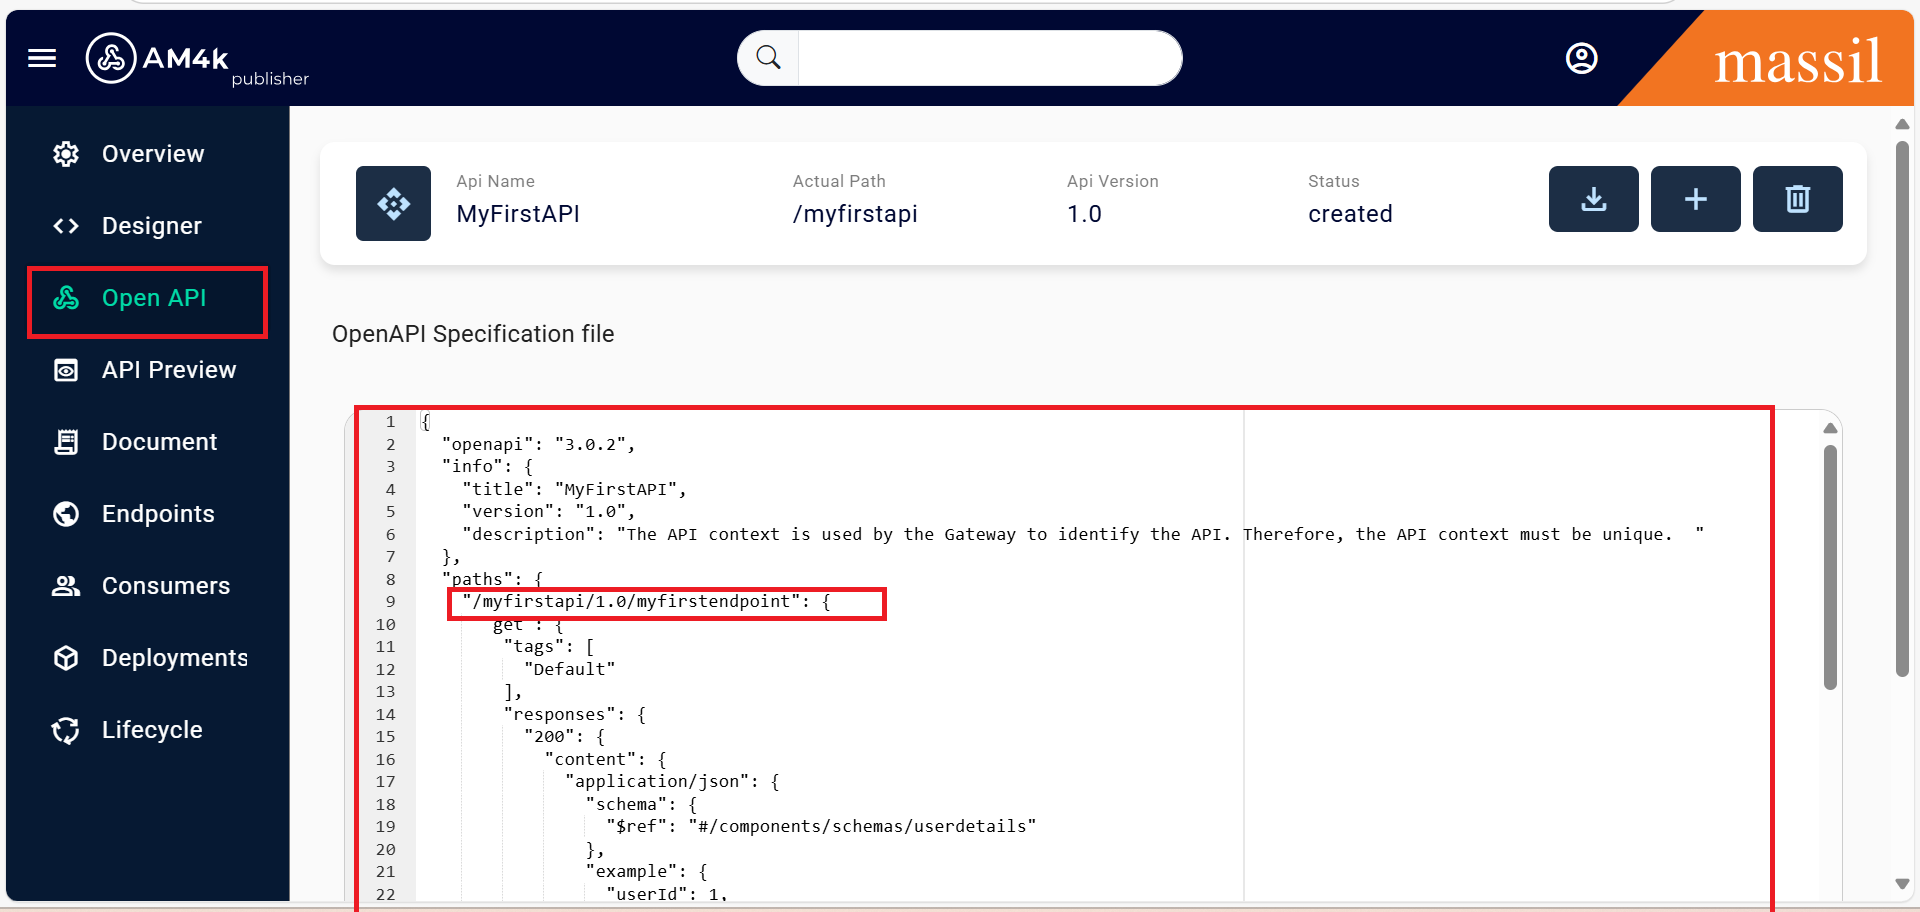
Step 15.Once all the required details are provided in the Response Body, navigate to the OpenAPI tab on the left side of the portal and verify whether the Swagger file is generated. If the Swagger file is successfully generated, you are good to go and can proceed with the deployment.Before proceeding with deployment, ensure that the OpenAPI file is generated click on Open API You can see it over there your swagger file as shown image below.
Step 16.Additionally, click on the Documents tab to verify that the document is generated with the correct request and response structure, as shown in the images below.